To use the resources available in tDAR, you need to become a registered user. The resources already uploaded to tDAR are free for you to use and download. A one-time fee is only charged when you upload your own data to tDAR. If you wish to upload your own resources after registering, you will need to purchase space and set up a Payment Account. The following modules will assist you in setting up and managing your tDAR account.
Register with tDAR
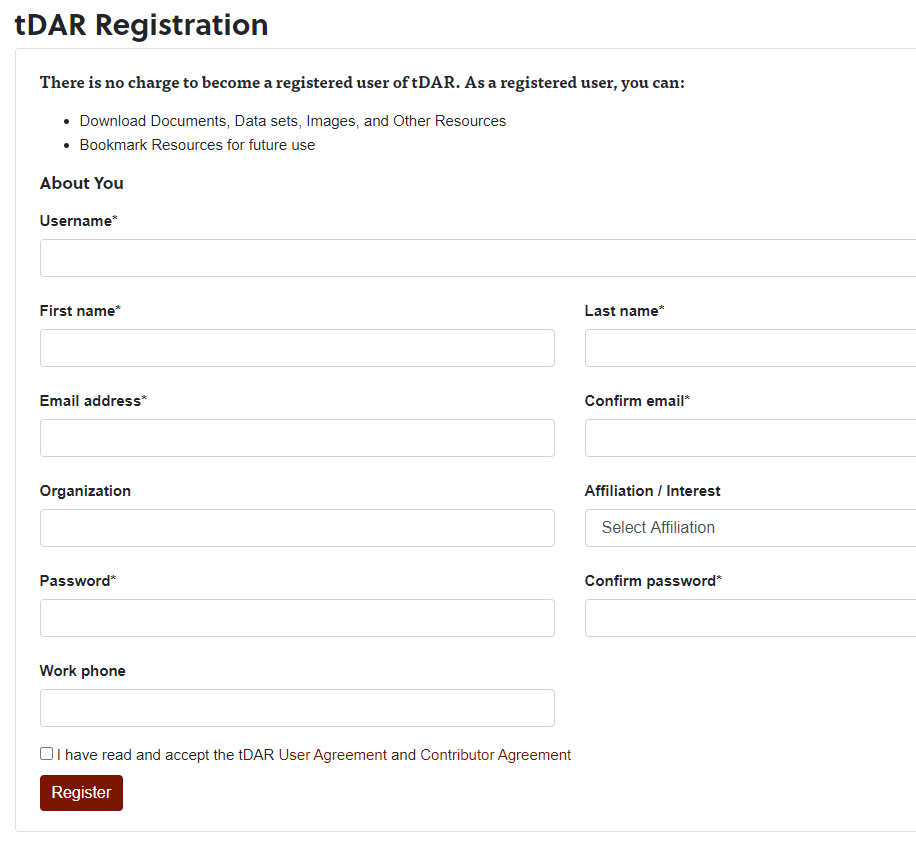
There is no charge to become a registered user with tDAR. As a registered user, you can:
- Download documents, data sets, images, and other resources
- Bookmark resources for future use
- Upload new resources to tDAR
To register as a new user, select Sign Up in the upper right corner of the tDAR page.

You will be asked to provide a username, password, and name. You can optionally provide your organization name, affiliation, and additional contact information as shown below.
How to Login to tDAR
In order to download resources or upload your own, you must be logged into tDAR. You can login on the tDAR homepage, or by clicking the Log In button on the tDAR toolbar at the top of your browser screen on any page you visit.
To login, enter the username and password you used to register with tDAR.
Forgotten Username and/or Password
If you forgot your password, select “forgot your password” in the login box and follow the instructions. If you have continued difficulty accessing tDAR, please contact us at comments@tdar.org.
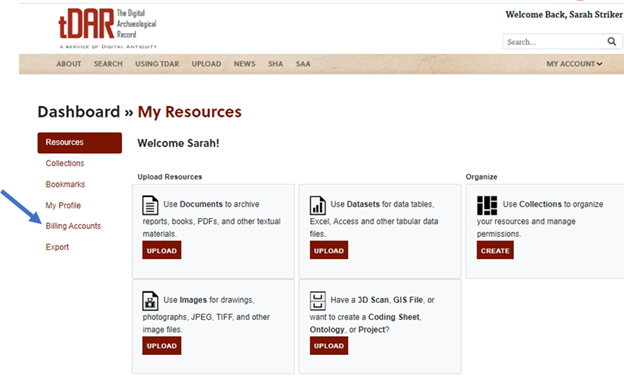
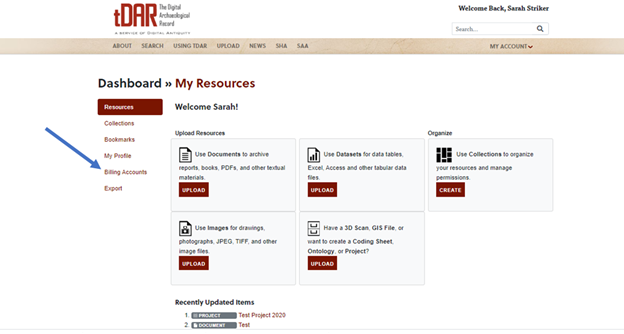
Your User Dashboard
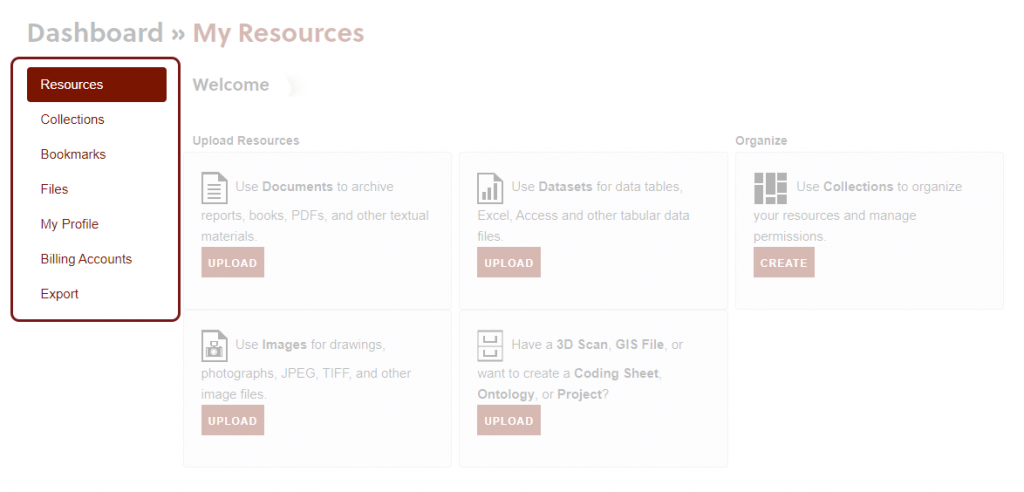
The User Dashboard, shown below, is the first screen you encounter when you login to tDAR. You can navigate the Dashboard using the menu on the left side of the screen to find Resources, Collections, Bookmarks, My Profile, Billing Accounts, and Export.

Resources
The Resources page links you to commonly used resource upload locations on tDAR and displays a list of items that you recently uploaded or updated.
Collections
The Collections page links to the Collections upload page where you can create a new collection provides a list of the users you have shared collections with, and displays a list of all of your collections.
My Profile
Your profile displays the information you entered when you registered with tDAR. You can edit this information at any time.
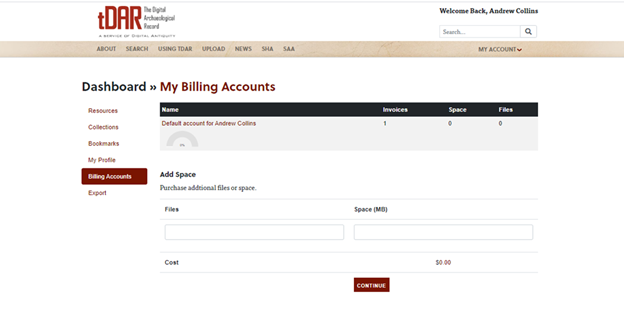
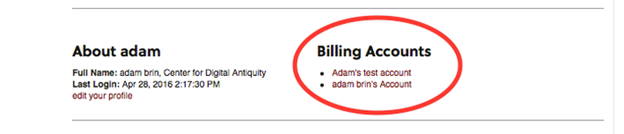
Billing Accounts
Billing accounts you have access to or manage are listed here. Includes the name, a number of invoices, space, and files billed to each. Click on the name of a billing account for additional details. You can also purchase additional storage space from this page.
Export
You can export collections from a billing account or collection that you manage.
How to Purchase File Space in tDAR
Registered users can purchase file space at any time. You can do this in one of two ways:
- via the Upload link in the top menu bar, or
- via the user Dashboard.
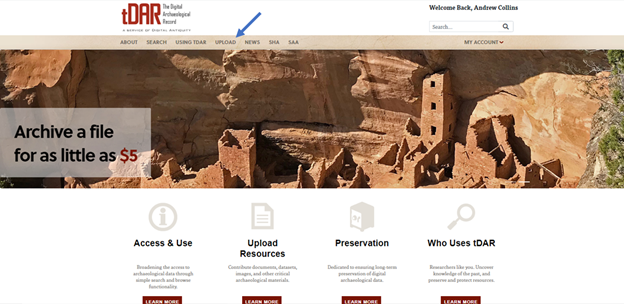
Purchase File Space from the Upload Link
From the tDAR homepage, select Upload from the top menu bar.
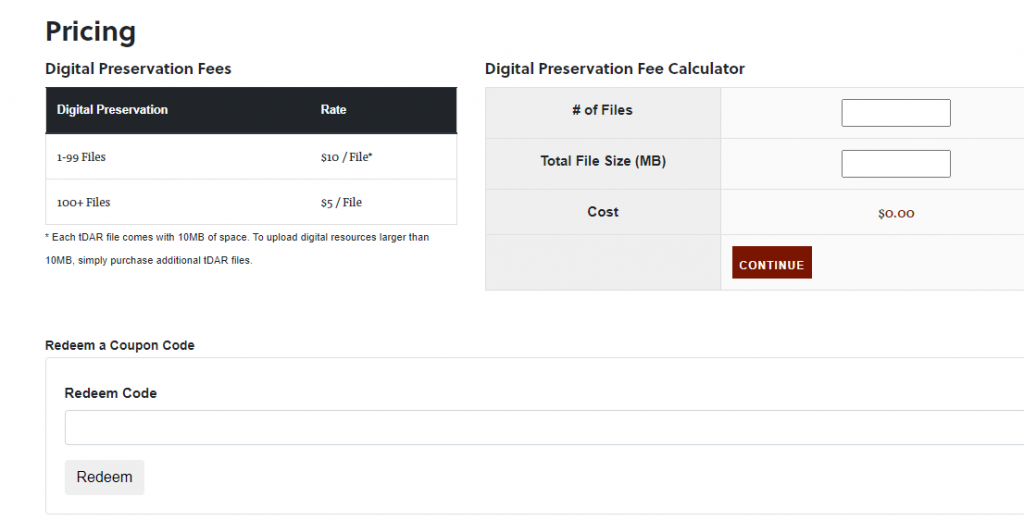
Next, use the Digital Preservation Fee Calculator to determine how much money you will need to add to your account to meet your needs.
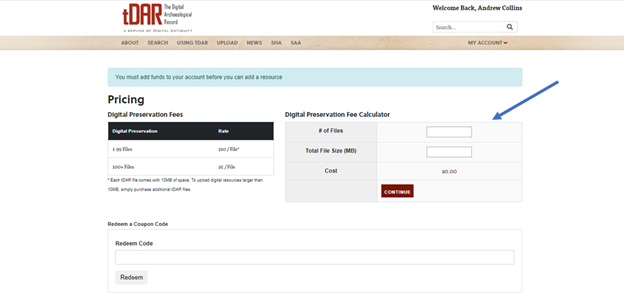
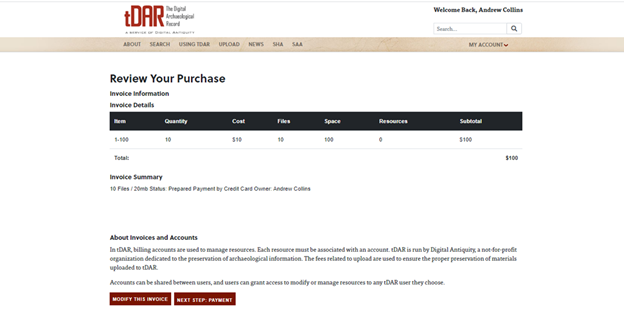
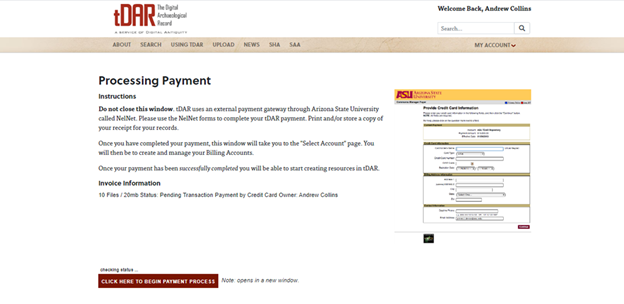
tDAR will use your input to generate an invoice for the dollar amount that would allow you to upload the amount of data that you entered. From this screen, you can choose to move onto payment, or you can modify the invoice if you would like to change the values.
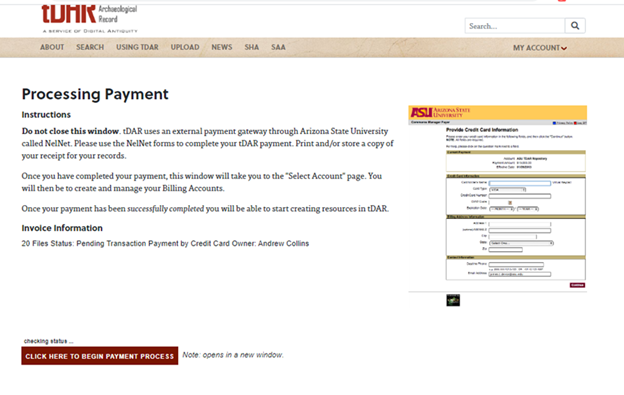
If you select the Payment option, the next page explains that you will be redirected to a third-party site to complete your payment. Please review your invoice before proceeding. When you are ready, select Click Here to Begin Payment Process. You will be prompted to add your payment information.
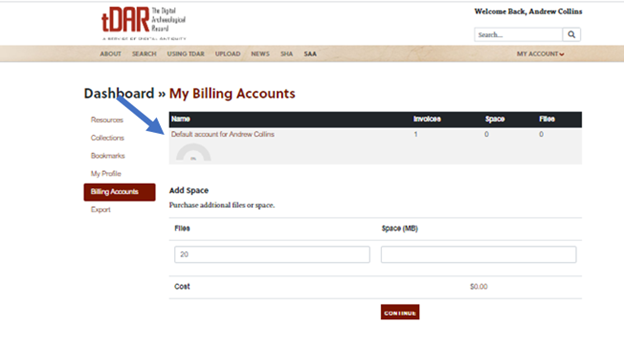
Purchase File Space from the Dashboard
If you already have a tDAR account, your User Dashboard is the first screen you encounter when you login. You can charge your user account using the Billing Accounts option in the menu on the left side of the screen.
From the Billing Accounts page, you can charge any of your linked billing accounts. Use the estimator tool to determine how much to charge, then select continue to enter your payment information as shown above.
How to Redeem a Voucher
Vouchers allow you to share files/space with other users without having to allow access to your Billing Account. If you have received a voucher code (for example, as part of your SAA Student Membership) enter it in the Redeem Code field. It will be applied to your invoice.
Pricing
The Pricing Page has information about how prices for tDAR are set, a rate calculator, information on professional services from Digital Antiquity, and a Pricing FAQ. If you have questions about pricing or would like a personalized estimate, please contact tDAR.
What Next?
Once your payment has been processed, you will receive a confirmation email from ASU. The previous page you were on in tDAR will automatically take you to where you can either add the space you just bought by adding the invoice to an existing account or begin setting up and managing a new account.
What happens if I forget to add an invoice to an account?
If you have a billing account already, tDAR will automatically add the invoice to your existing account.
If you do not have a billing account or have multiple billing accounts, tDAR will generate an additional or new account for the invoice. You will still have access to the space you purchased.
Creating and Managing a Billing Account
Create a New Billing Account
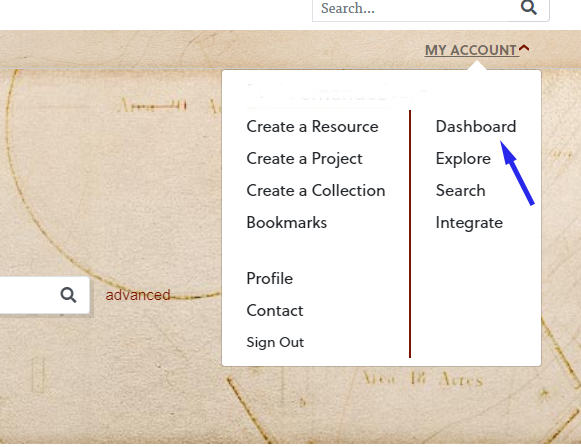
Login to tDAR and navigate to your User Dashboard. Find My Account in the upper right menu bar and select Dashboard from the dropdown menu.
From your Dashboard, navigate to Billing Accounts in the left menu bar.
In your Billing Accounts menu, you will see any current billing accounts linked to your tDAR username. To create a new account, enter the number of files and/or the space you would like to add in the fields provided. You will have the option to add this to a new billing account on the next screen.
On the Review Your Purchase screen, you can choose a billing account to add your funds to. Here, you can create a new billing account by selecting Add an account from the dropdown menu.
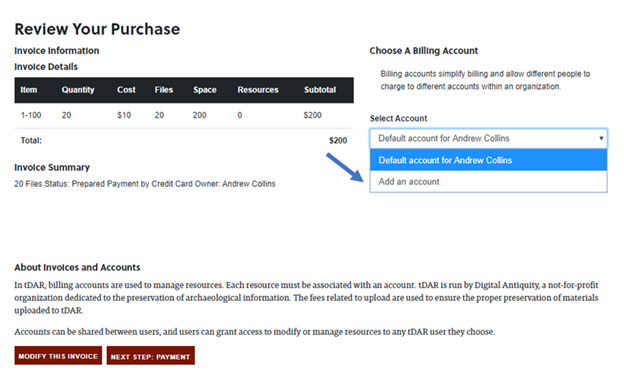
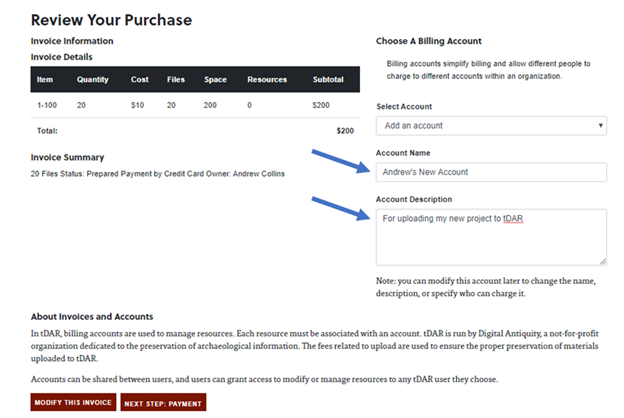
When you select Add an account a new set of entry prompts will appear. Name your new account and provide a description, if desired. Then, click the Next Step: Payment button at the bottom of the screen.
On the next screen you will be informed that payment will be finalized using ASU’s payment system. When you follow the prompt to the next screen, you will be asked to provide payment via credit card. If you need to pay in some other way, or have special billing concerns, contact tDAR help.
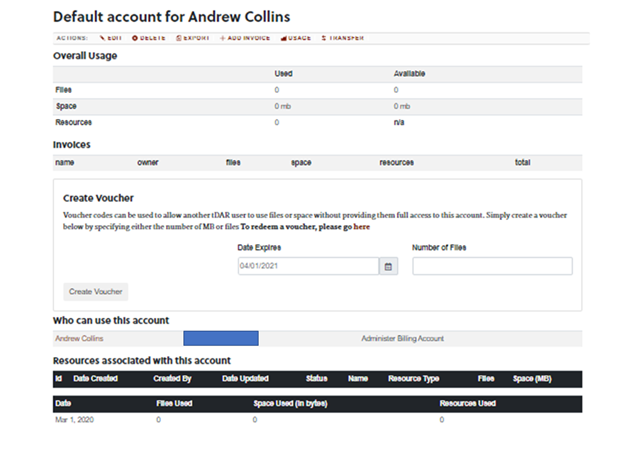
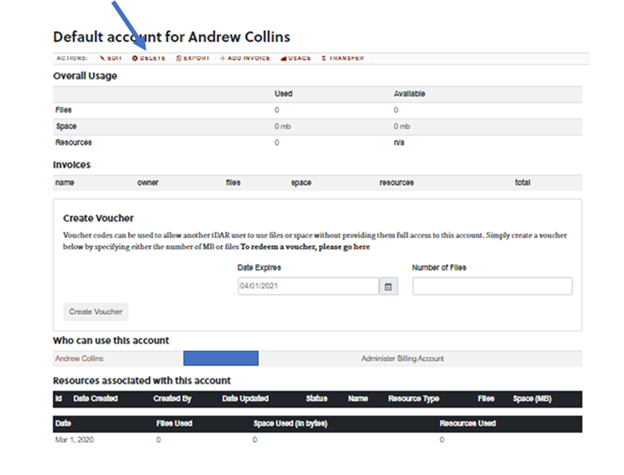
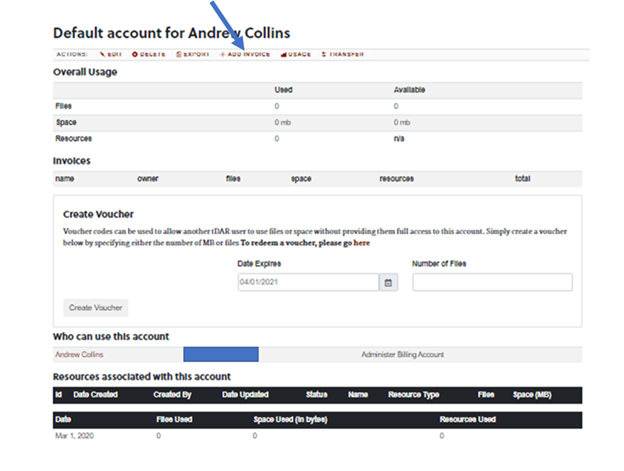
Managing your Billing Account
Once you have created a billing account, you can access your account, manage users, create vouchers, and add funds at any time. Login to tDAR and navigate to your “Billing Accounts” page on your Dashboard as described above. To modify a billing account, select one of your current accounts as shown.
Editing Your Account and Adding Users
Select edit and you will be able to change the account name, account description, and add users to the account.
To add a user, enter their name and email address (if they already have an account with tDAR, use the same email address) and select the permission type you would like to grant.
You can delete individual users by selecting the trash can icon next to their name.
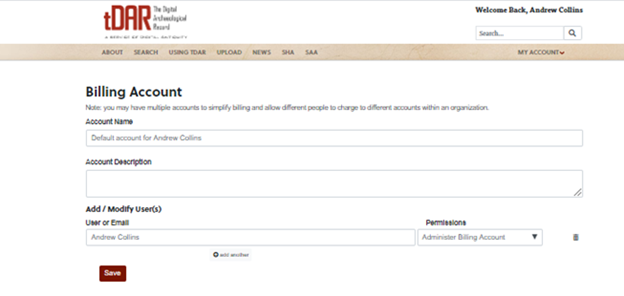
To delete the account, select the delete button. You will then be asked to explain why you are deleting the account, and confirm that you do want to delete the account.
If you want to buy more space/files for this billing account, select the + Add Invoice option. This will take you through the process described in How to Purchase Files/Space in tDAR.
Voucher Codes
From this page you can also create a voucher. Vouchers allow you to share files/space with other users without having to allow access to your Billing Account.
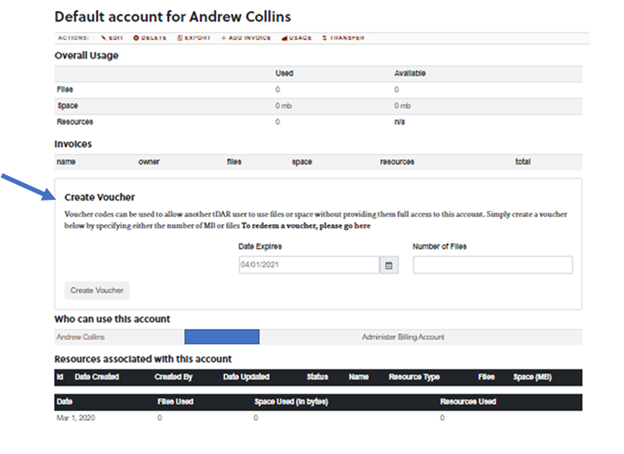
Enter the number of files or MB per voucher you wish to allot. You can also select the year the vouchers will expire.
When you are done, select the “Create Voucher” button.
The voucher codes that were created will appear on your billing account page. The number of files, space, expiration date and code are listed for each voucher.
When a code has been redeemed, it will be indicated to the right on the code. To share the code via email, select the “send via email” option.
If you have received a voucher code (for example, as part of your SAA Student Membership) enter it in the “Redeem Code” field on the Pricing Page. It will be applied to your billing account.

What Next?
Now you can use the files/space that you have purchased to add resources to tDAR. We suggest that you plan out how you want to organize your contribution, especially if you’re uploading multiple, related resources. See Tools for Organizing Your Data.
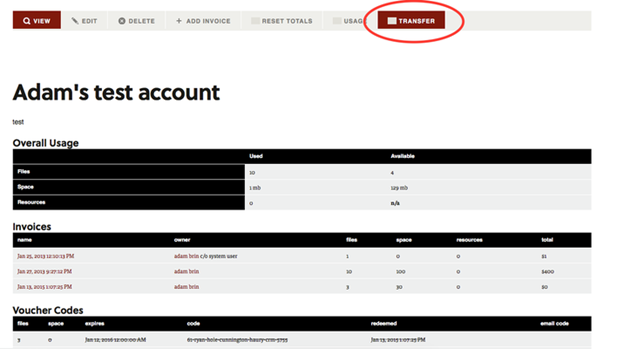
Transfer a Billing Account Balance
In tDAR, billing accounts are used to manage multiple purchases or invoices. If you’re done with your account, you can transfer the balance of a billing account to another account or user. This is useful, for example, for sharing remaining money in your account with others working on the same project. The process is quick and easy:
Login to tDAR and you will be routed to the Dashboard page. Select Billing Accounts in the menu on the left side of the Dashboard
Choose the account you’d like to transfer [update with screenshot from not Sarah’s account]
Click the Transfer button in the billing account toolbar.
Choose the account you’d like to transfer:
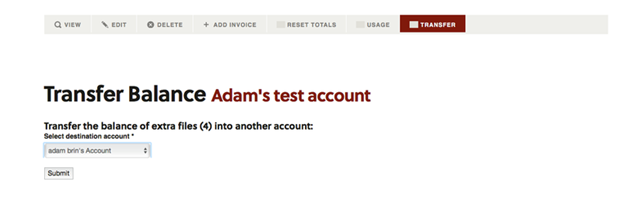
Click Submit & you’re done.